Note: This article is for users of Microsoft Outlook 2007. If you are using Microsoft Outlook Express, please refer to this article. These similarly named email clients have different setup instructions.
1. Open up Outlook 2007. Click Tools, then Accounts Settings from the menu bar.

2. In the "Accounts Settings" screen, make sure the E-mail tab is selected, then click New.

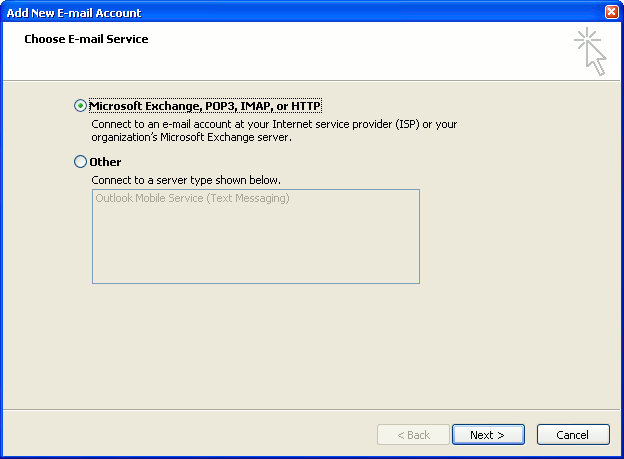
3. Choose Microsoft Exchange, POP3, IMAP or HTTP, then click Next.
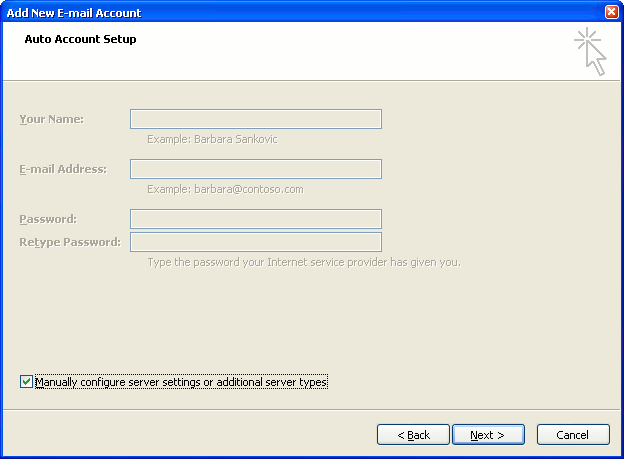
4. In the "Auto Account Setup" screen, simply leave the fields empty, check the Manually configure server settings or additional server types checkbox, then click Next.
5. Choose Internet E-mail, then click Next.

6. The "Internet E-mail Settings" screen is the window where you'll enter most of your account settings. You want the window to look like this:
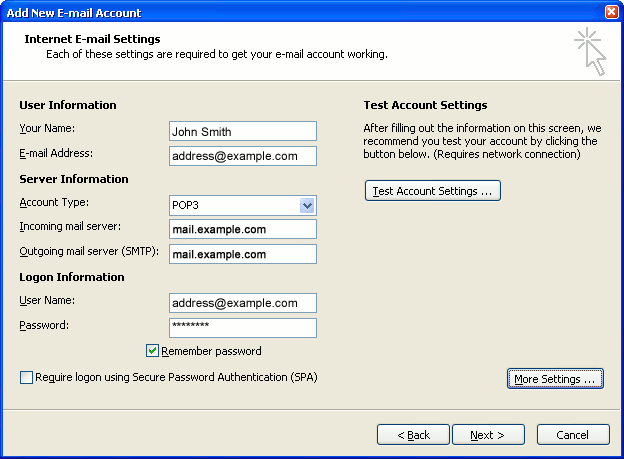
- "Your Name" is the name that other people will see when you send them e-mail. It should usually be your real name, such as John Smith.
- Enter your "E-mail Address". The address must be the e-mail address of the POP mailbox you created in your account management control panel.
- For "Account Type", choose POP3 or IMAP depending on your preference. Please refer to differences between POP3 and IMAP
- Replace mail.example.com with the given server name for both the "Incoming mail server" and "Outgoing mail server (SMTP)". It normally your domain name with "mail." as the prefix.
- Enter your e-mail address again as the "User Name". (The user name must be all lower case).
- Type your e-mail password into the "Password" box. This is the password you chose for this e-mail address when you created the mailbox in your account management control panel. Remember that this password may be different from your master account password. You can also check Remember password if you don't want Outlook to ask you for the password each time you read e-mail.
- Make sure that "Require logon using Secure Password Authentication (SPA)" is not checked.
- Do not click "Test Account Settings" yet; it will not work until you complete the next steps
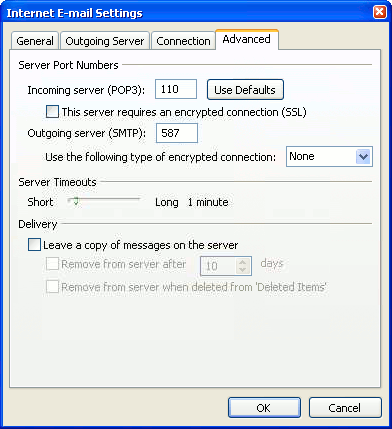
7. Click the "More Settings" button. A new "Internet E-mail Settings" window appears.
8. Choose the "Outgoing Server" tab. In the "Outgoing Server" tab, check My outgoing server (SMTP) requires authentication. Select Use same settings as my incoming mail server.

9. Click the "Advanced" tab and change the "Outgoing Server (SMTP)" port number to 587. Doing this makes sure that your ISP will not block your outgoing mail connections. Please note that the default Incoming server port number for POP3 is 110 and IMAP is 143.
10. Click OK to close the "Internet E-mail Settings" window. After you close the "Internet E-mail Settings" window, the "Add New E-mail Account" screen will still be visible.
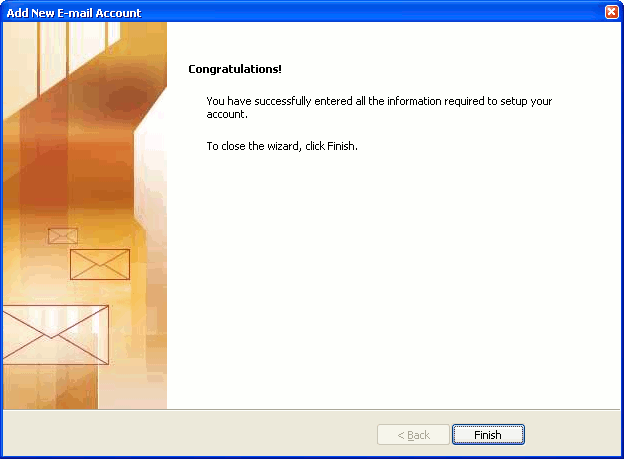
11. Click Next, then Finish.